Bootloaders:
chipKIT
avrdude Bootloader
Note that by default, chipKIT boards automatically reset the
MCU when
the FTDI COM port is first opened by the host computer. This behavior can
be disabled (which is how I run) by cutting the trace under JP1 on the Uno32 or JP5 on the Max32,
and then installing a removable jumper.
If you have cut this trace, you will need to manually reset the board
immediately before running avrdude, below, or temporarily install the jumper on
the board. If you have not cut the trace, then every
time you subsequently connect the terminal emulator to the board, the MCU will
be reset. During the 4 seconds following reset, you must not enter any input on the terminal emulator or the
bootloader will crash! After 4 seconds with no input from the terminal
emulator, the bootloader will automatically transfer control to StickOS and
then you can
then press
<Enter> to get a command prompt.
- Download the avrdude
program for Windows and the
avrdude
configuration file and possibly the
libusb0.dll (.EXE, .CONF, .DLL for chipKIT Uno32 and Max32)
- Connect the board to the host computer.
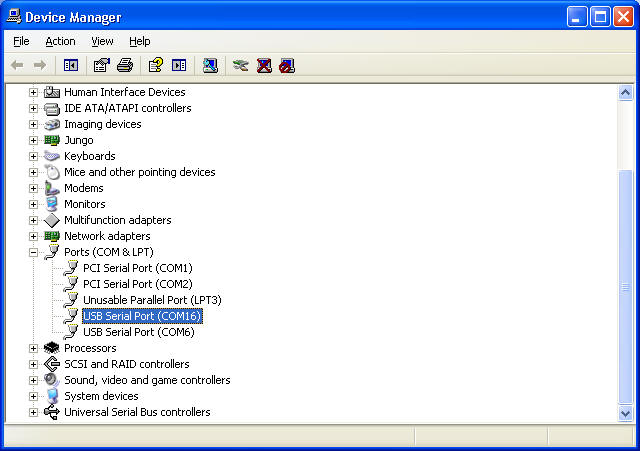
- Determine the COM port used by the FTDI chip:

- Download the appropriate avrdude bootloader image file
from the CPUStick™ and StickOS® --
Downloads page.
- Reset the board (only needed if you have cut the trace
under JP1 or JP5, above), and then immediately invoke the command below.
- In a command prompt, invoke avrdude as follows, with your
particular COM port and avrdude bootloader image file specified:
avrdude -C avrdude.conf -c stk500v2 -p pic32-360
-P COMX -U flash:w:StickOS.XXX.hex
Note that if you receive a flash verification error from
avrdude, you likely have an old bootloader running on a new chip -- the old
bootloader is incompatible with PIC32's with date codes beyond 1101 or so,
as the PIC32 flash timing requirements actually changed in newer silicon,
and so it fails to write flash correctly! See
StickOS Revision
History and Known Bugs (the same bug affected StickOS, but StickOS
has been fixed as of v1.92 -- but the bootloader can be broken
independently).
- StickOS should be running, with the heartbeat led
blinking slowly.
- Remember to configure your terminal emulator for XON/XOFF
flow control since behind the FTDI COM port is a traditional UART on the
MCU!
- Remember that if you have not cut the trace under JP1
or JP5, above, then every time you subsequently connect the terminal
emulator to the board, the MCU will be reset. During the 4
seconds following reset, you must not enter any input on the terminal emulator or the
bootloader will crash! After 4 seconds with no input from the terminal
emulator, the bootloader will automatically transfer control to StickOS and
then you can
then press
<Enter> to get a command prompt.
avrdude USB Bootloader (CUI32Stem, etc.)
- Before connecting the board to a Windows USB host
computer, install the stk500v2.inf file by saving it to a file,
right-clicking on the file, and selecting "Install"; you can ignore warnings
about an unsigned driver package -- the driver is straight from Microsoft,
and only the INF file itself is unsigned. The INF file allows Windows to
bind a human readable name, "Stk500v2", to the USB VID/PID presented to the
host by the avrdude bootloader. The latest version of the stk500v2.inf file
can always be found at: https://github.com/rtestardi/StickOS/Stk500v2.inf
- On boards with a PRG switch, hold down the PRG switch
while powering up the board to permanently enter the bootloader.
- Continue here.
- The source and binary for the bootloader is here:
https://github.com/rtestardi/PIC32-CDC-ACM-Stk500v2-Bootloader
Microchip HID
Bootloader
- Download the Microchip HIDBootLoader
for Windows (.EXE, for CUI32 and UBW32).
- Connect the board to the host computer while holding down
the PROG or PRG button on the board.
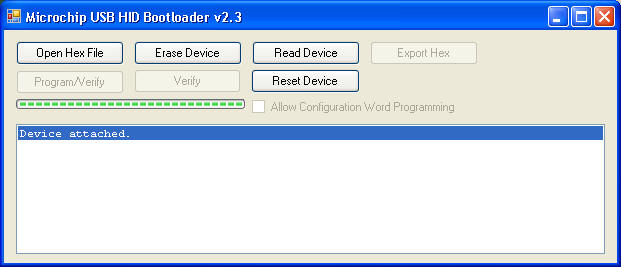
- Launch the Microchip HIDBootLoader
for Windows; verify that the device is attached:

- Download the appropriate StickOS HID bootloader image
file from the CPUStick™ and StickOS®
-- Downloads page.
- Press "Open Hex File" and browse to the HID bootloader
image file.
- Press "Program/Verify".
- Disconnect the board from the host computer and reconnect
it while not holding down any buttons on the board.
- StickOS should be running, with the heartbeat led
blinking slowly.
Freescale DemoKit/Badge
Board MST Bootloader
- For the Badge Board, enter bootloader mode by connecting
the board to the host computer and then pressing F4;
for the DemoKit, enter bootloader mode by pressing SW1 and then connecting
the board to the host computer.
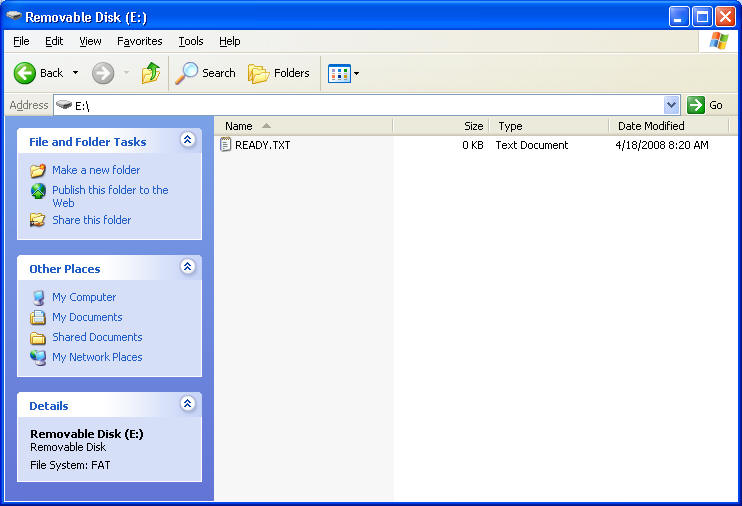
- Verify that a new USB MST removable disk shows up on your
host computer:

- Download the appropriate MST bootloader image file from
the CPUStick™ and StickOS® --
Downloads page.
- Drag and drop the S19 file to the new removable disk
exposed by the board.
- Once the Explorer window responds, the firmware should be
updated.
- Disconnect the board from the host computer and reconnect
it while not pressing or holding down any buttons on the board.
- StickOS should be running, with the heartbeat led
blinking slowly.


